How to properly use Filters
When creating campaigns, it is crucial that you choose the correct filters.
Filters are needed, so the system knows exactly who should or should not receive this particular campaign.
If the filters section is left blank, the system will mass blast your WHOLE database.
Filters
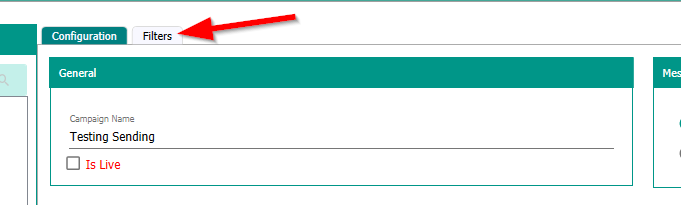
To get started on selecting your filters, Select the saved campaign you would like to work on and hit "Edit", then click on the filters tab at the top middle of your screen
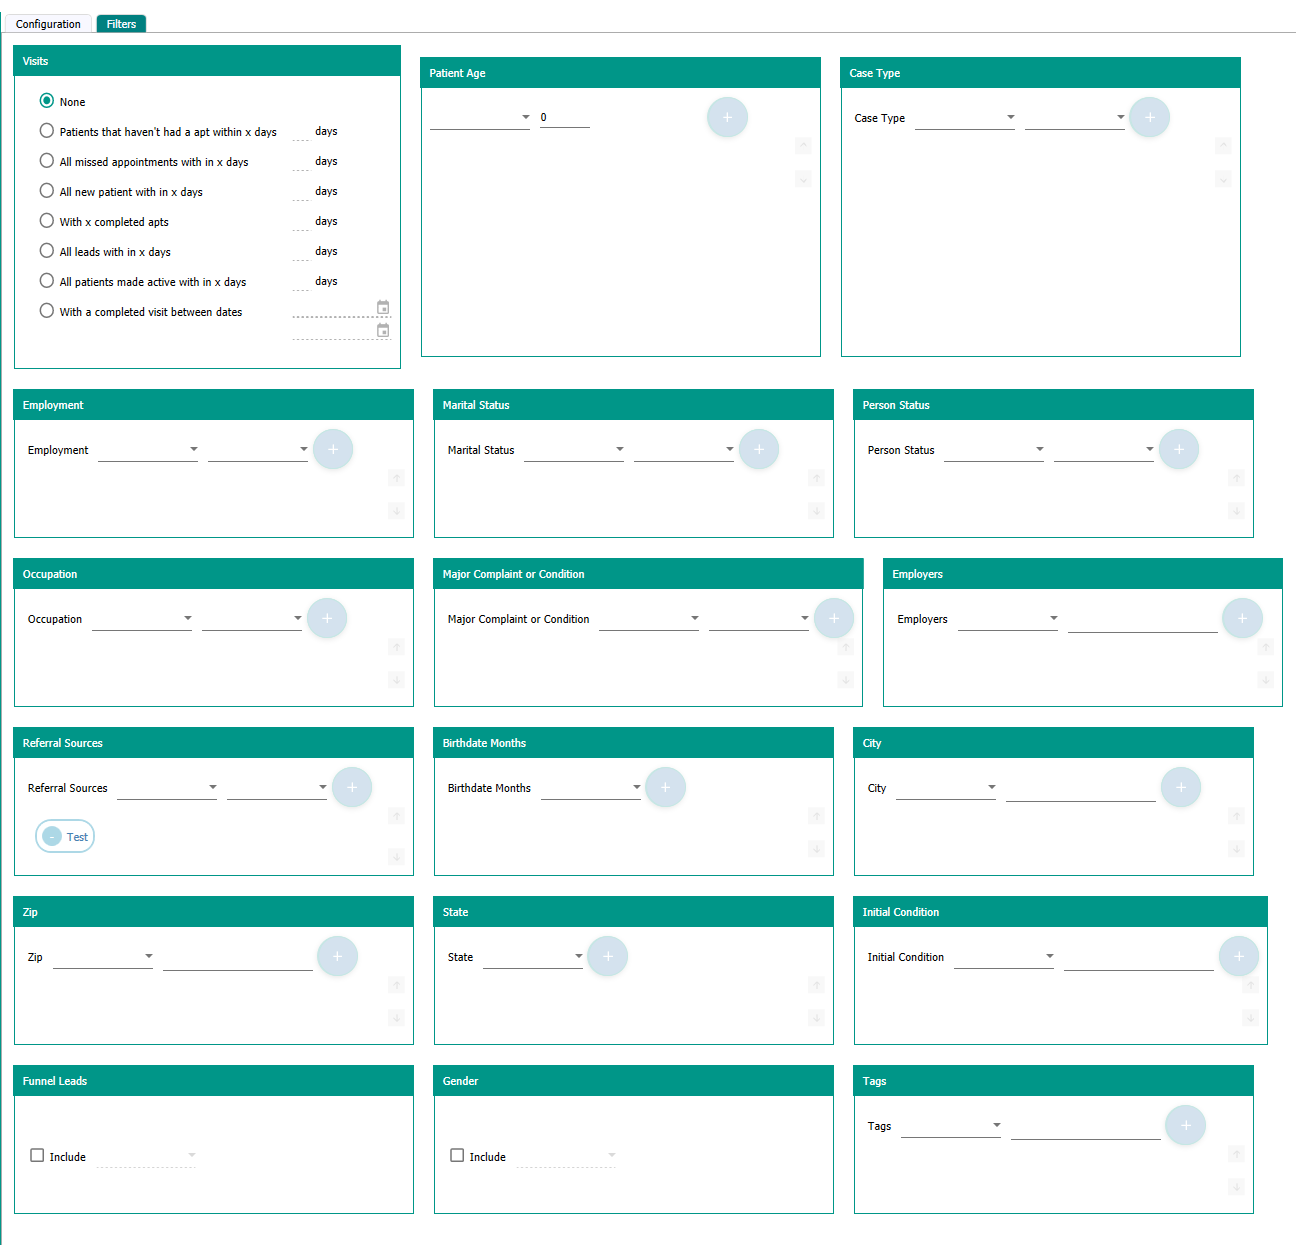
This is the screen you will see
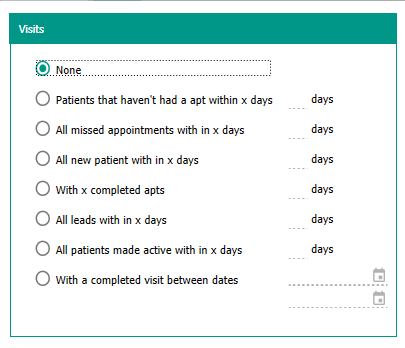
Visit Filters
Visit filters refer to patient visits ONLY. Each Visit Filter option allows you to select a numerical value of 0-100.
Please keep in mind: If you include Visit Filters to your Email/Text Campaign and a Patient no longer falls under that filter, they will be excluded from the campaign when it is selected to run again.
Patient Filters
You can select a multitude of filters, so the system can send the Email or Text to the correct people you are wanting to market to.
Patient Filters include:
- Patient Age
- Case Type
- Employment Status
- Marital Status
- Person Status (Lead, New Patient, Active etc.)
- Occupation
- Major Complaint or Condition
- Employers
- Referral Source: Tied to the Patient/Lead (either manually added into Katana or automatically added when they signed up on a Kfunnel)
- Birthday Month
- City
- Zip
- State
- Initial Condition
- Funnel Leads
- Gender
- Tags
When you want to make a selection, go to the filter you would like to work with and select the first dropdown
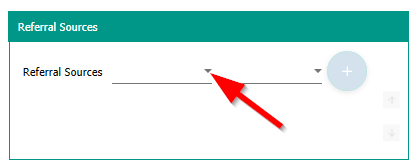
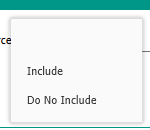
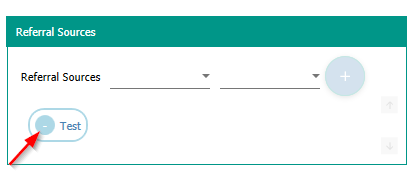
Each one will have different selections but, for Referral Sources, you would select Include or Do Not Include
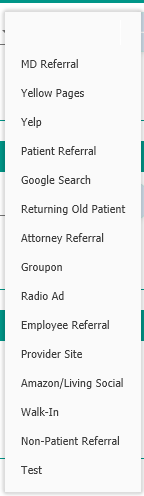
Then choose the second dropdown

Select the correct Referral Source from YOUR list (This list is also found in Admin>Referral Source):
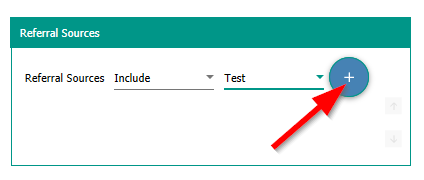
Once your selection has been made, Select the + sign to lock it in. THIS STEP IS VITAL.
Once locked in, you will see it appear like a tag. If you need to select another option, repeat the same steps as many times as needed
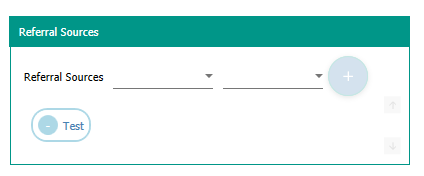
If you happen to add one by mistake, Press the - sign to remove it.
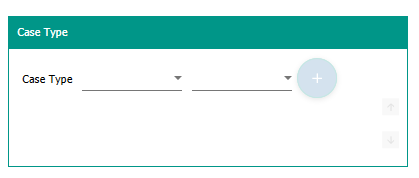
Case Type Filter
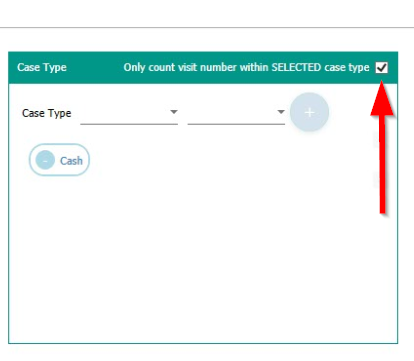
This is a unique filter that will allow you to select a specific case type and indicate that visit filters can only work with the designated case type.
Once a case type is locked in, an option will appear that states "Only count visit number within SELECTED case type"
If this box is selected, this makes sure that visits from other cases tied to the patient are not counted when the system is performing is comb through.
Ie: Only wanting visits counted from a chiro case but, excluding the number of visits within the massage case.
If this filter is not used, the system will calculate the TOTAL number of visits within a patient's file and if they fit, the campaign will be sent. Chiro Case = 1 appt. Massage= 2 appts. for a grand total of 3 appts.
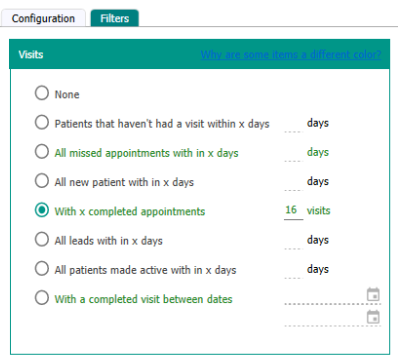
Choosing the Proper Visit Filter for this Campaign
When the check box is selected, the visit filters that can be used are highlighted in GREEN. These are the ONLY options available when creating a campaign to count visits within a specific case.
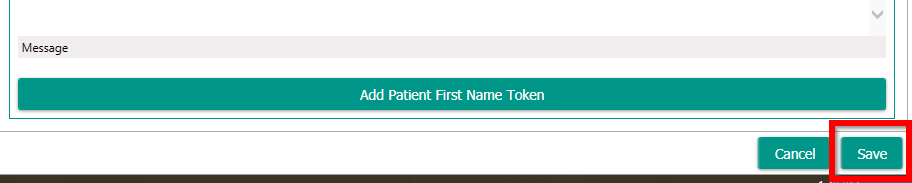
SAVE your created Campaign
Once you have selected all necessary information, filters and made sure no changes need to be made, you will now select the SAVE button to the bottom left of the screen.
Now your Campaign is ready to be tested.
Comments
0 comments
Article is closed for comments.