The steps to copy a button from one template to another template are as follows (Please look below steps for more details on getting this completed) :
- Open template you want to copy the button from
- Copy text
- Paste into a document
- Open the template you want to place the button in
- Copy text from document
- Click on empty button and paste text, to get button created
- Edit the Title and Color of the button
1.) You would first want to open up the template that you want to copy the button from. You could do this on your own user within Katana by logging in to your user, opening an appt, and then clicking the little green circle in the bottom left corner of the macro's panel and click import template, and select the one you want to use, and that will upload the template to your user.

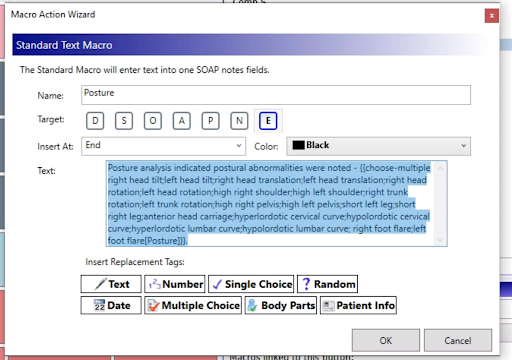
2.) Then you will want to click Drag-Drop mode to go into Edit mode, right click on the button that you want copied then select the macro and click Edit button.

In that window, highlight and right click and copy all of the text that is in the Text box there.

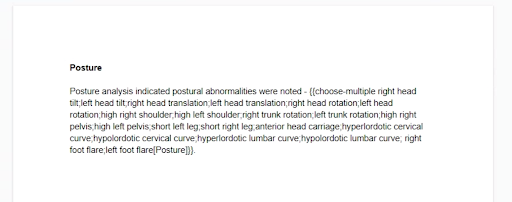
3.) Then paste it either into a Google Docs or Word document. And above it you could place what the title of the button will be and the color as well (if you would like).

4.) You will do this for all buttons one by one that you want copied over to your new template. And once they are all copied onto your document, you can then open/upload then you can paste them into the other template.
So now we will import the template that you want to copy the buttons to. You will click the little green circle in the bottom left corner of the macros panel and click Import template from file again, and select the template you want to import.

5.) Next pull up your Word/Google Docs document, and highlight and copy the text that you pasted there.
6.) Go back to Katana/macros template and click on an empty button to create a macro button, select to create a Standard Text Macro.

Then you can right click in the Text box, and paste that text in. Then choose an area that you want the text to be placed into, in your notes (SOAPNE), and place in a title for the macro and click OK to save.

7.) Now you will see the button created, it will be a white color and you can change the title of the button and color of the button. Then click Notes Mode to test our your button.

This will copy the coding that was on the button in the first template, and place it on a button in the second template. So that all the text and actions (multiple choice, single choice, patient data, etc) will be placed on the new button.
If you need to add more buttons within a category you can right click on a category button (top row) and a window will pop up where you can edit the number of buttons that are in that column. Also please note that there is not a way to move the order that the categories are in.
Once you are finished editing your template and it is to your liking, please save that macros template so that you will have a copy of it. To do this click the little green circle in the bottom left corner of macros template panel, and then click the Export template option to save it to your computer.
-Support Information -
If you have any questions or need assistance with this process please contact
Support by:
Live chat: Click the 'Support Portal' button in your main toolbar (on left-hand side) within your software, click the green 'Support' box in bottom right of screen.***This has the fastest response time***
Phone: 909-378-9514
Email: support@coactionsoft.com
Business hours: Monday-Friday, 8:00am-6:00pm CST

Comments
0 comments
Article is closed for comments.