Every now and again, a situation will occur where a patients appointment will get scheduled on an incorrect case or a case that should not have been created.
Typically, this mistake is caught AFTER the patient has been seen in the office and data has been saved in the appointment
Here are the steps to correct this issue.
First step: Deleting the Appointment, Scheduled on the wrong Patient/Case/Provider.
1. Go to Patients in your software toolbar
2. Select Patient
3. Go to patient file
4. Select the appointments tab
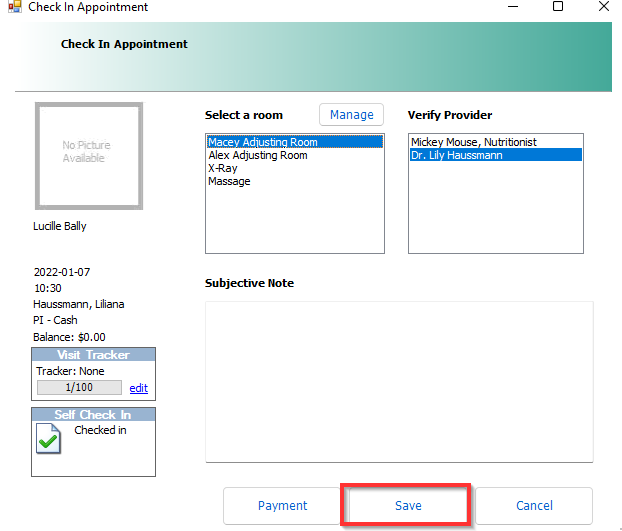
5. Select the appointment you want to delete (Jot down the appt date/time/ROV as you will need it in Step 2)
6. Select “review”
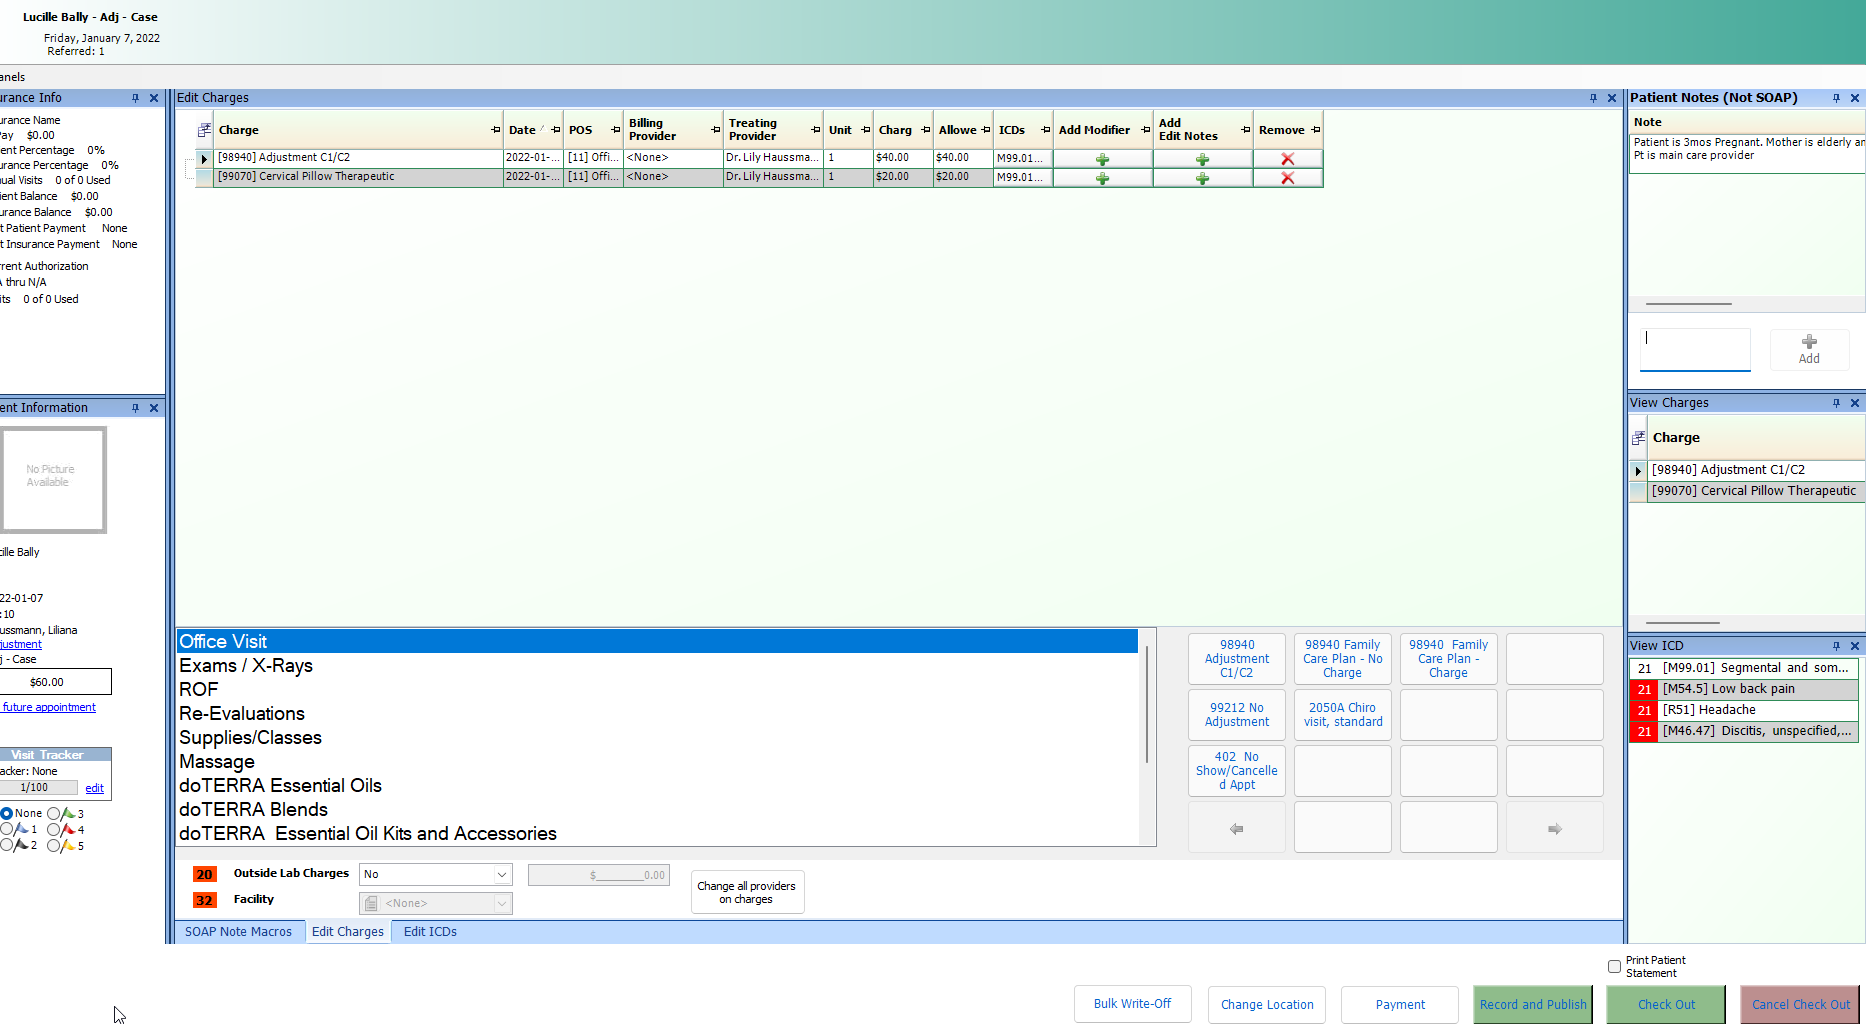
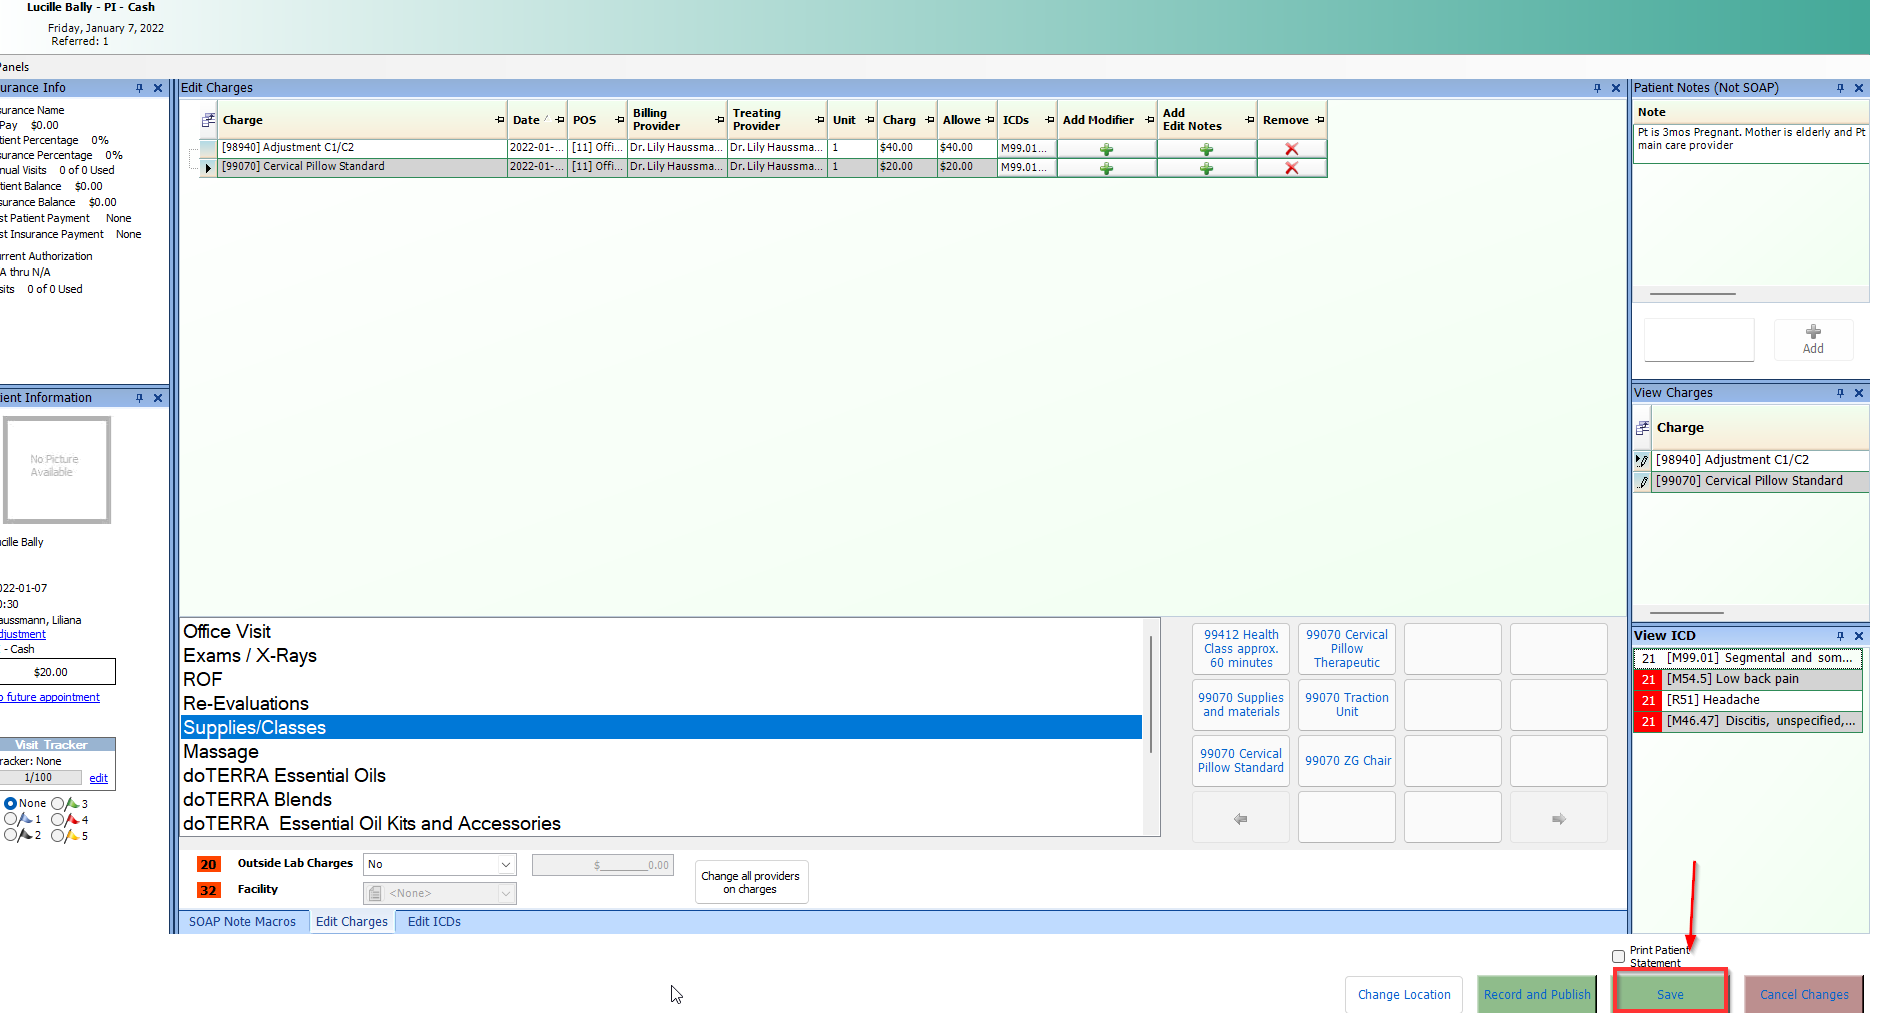
7. Before you make any changes: We strongly suggest that you write down the CPT codes used, ICD codes entered and copy and paste soap notes to a word pad, word Doc or something so you can just paste them into the correct appointment
- Then delete all Soap notes, CPT’s, ICD’s, anything you have added to this appointment.
8. Click on check out on the bottom right corner
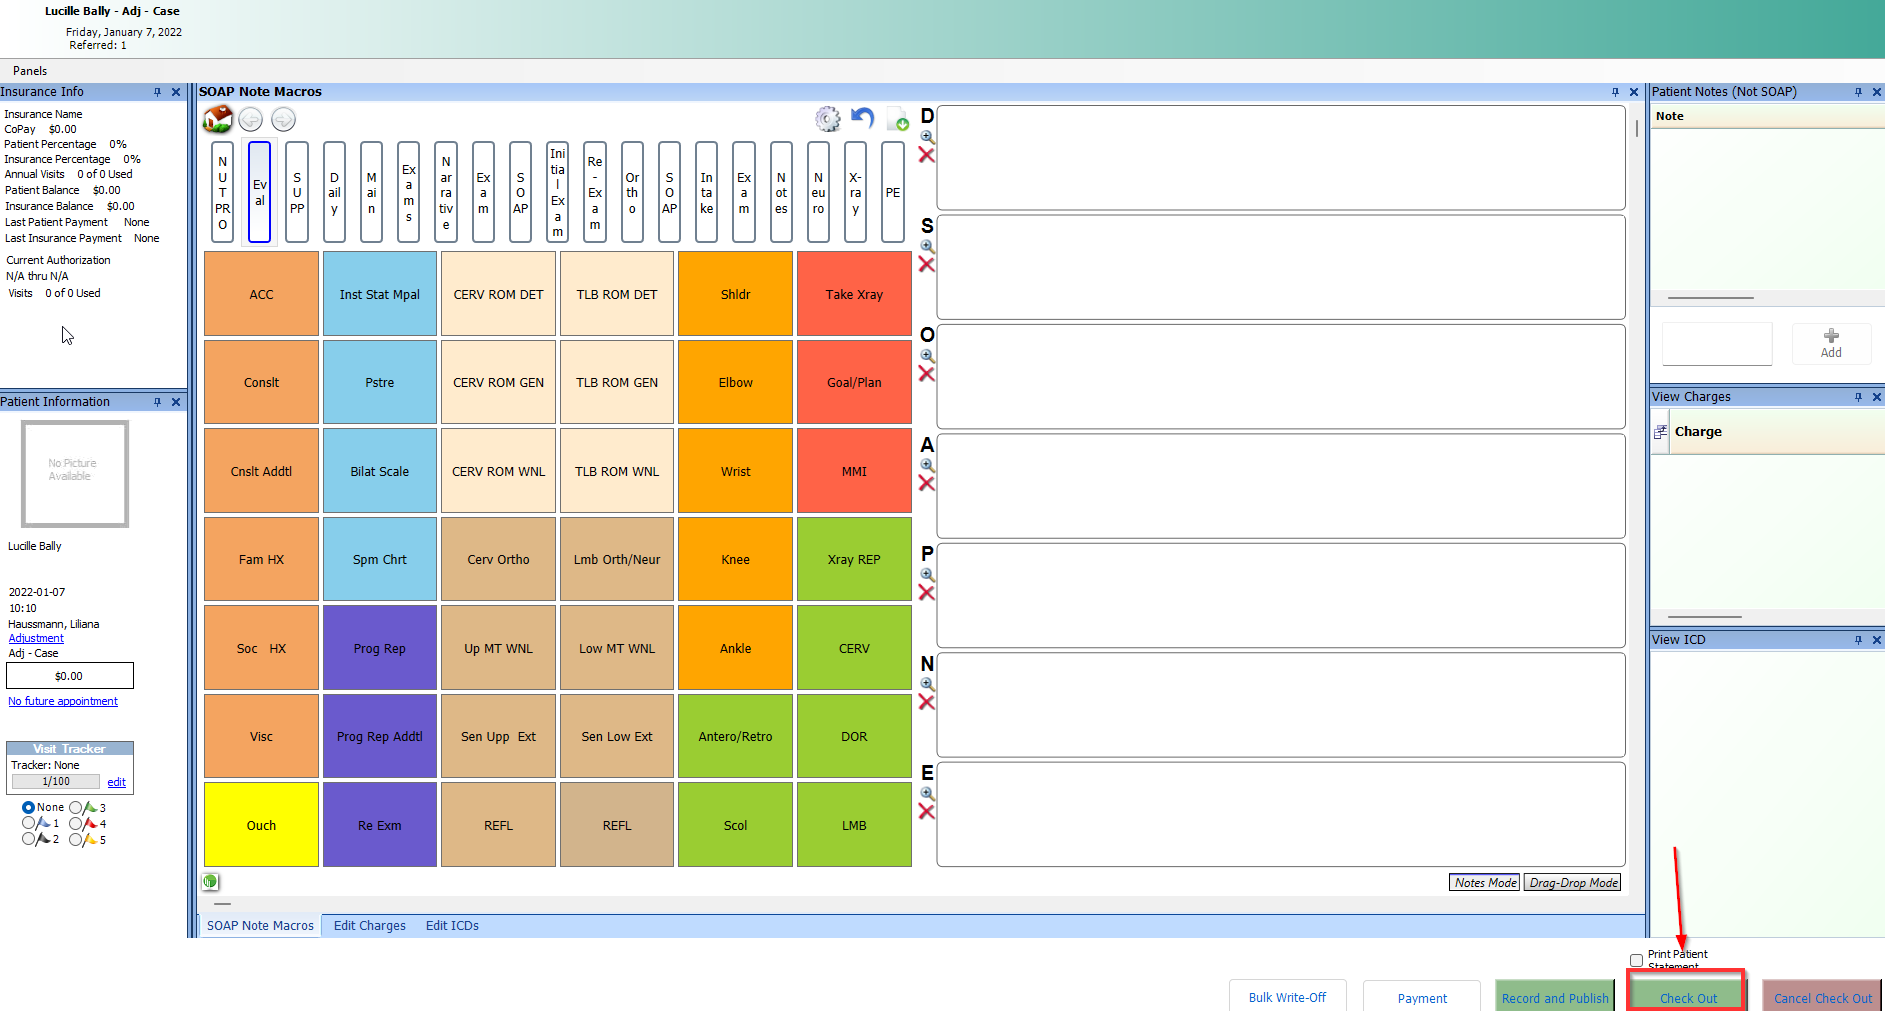

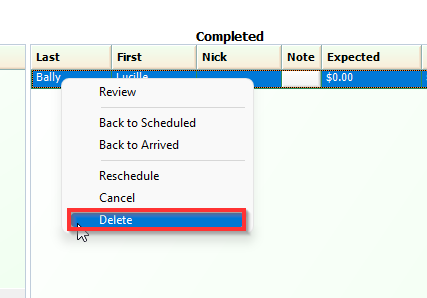
9. Select the same appointment once again and Click delete
Second Step: Scheduling the appointment again
1. Go to Appointments in your software Toolbar
2. Select Appointment book
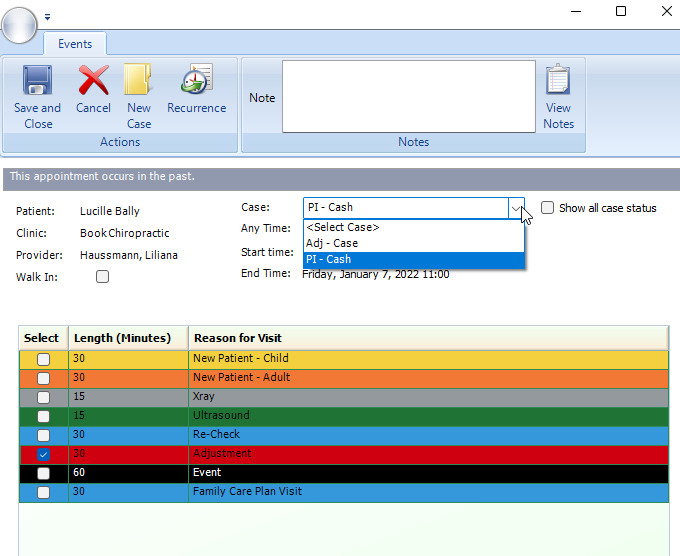
3. Select the correct Patient, Date and Time the patient came in for their appointment that was previously scheduled.
4. Select Patients name
5. Select the CORRECT case the appointment should be scheduled on, ROV etc.
6. Save and Close
Third Step: Completing the Appointment
1. Go to Appointment Dashboard
2. Select Patient Appointment you just scheduled

3. Double click scheduled appointment and move to arrived
4. Select Room the patient was originally placed in and confirm provider
5. Open the appointment and add in all data from that deleted appt (CPTs, ICDs, Soap Notes etc.)
6. Save appointment
7. Open Appointment again
8. Select Check Out
If the case your appointment was accidentally scheduled on, was created in error, please continue to the fourth step.
Fourth Step: Closing a Case Created in Error or Closing Duplicate Patient
Closing a Case:
1. Go to your Rolodex
2. Select Patient
3. Go to Patient file
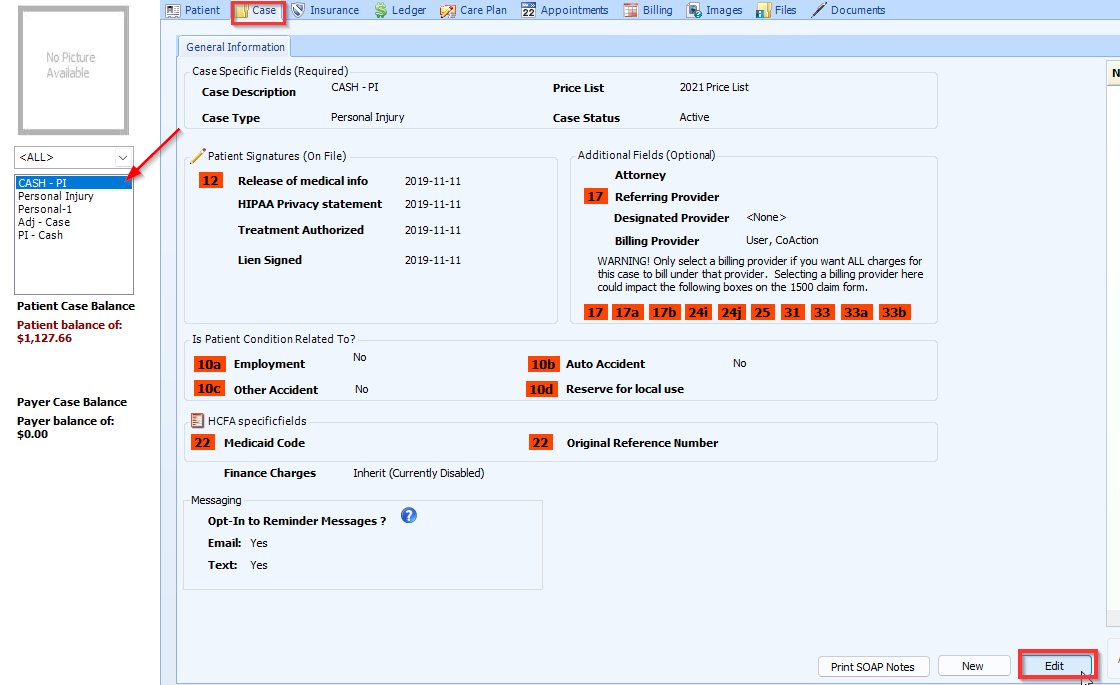
4. Select Case that was created in error on the left
5. Select Case tab
6. Select Edit
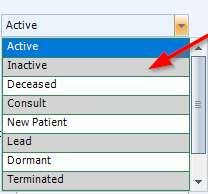
7. Change status from Active to Closed
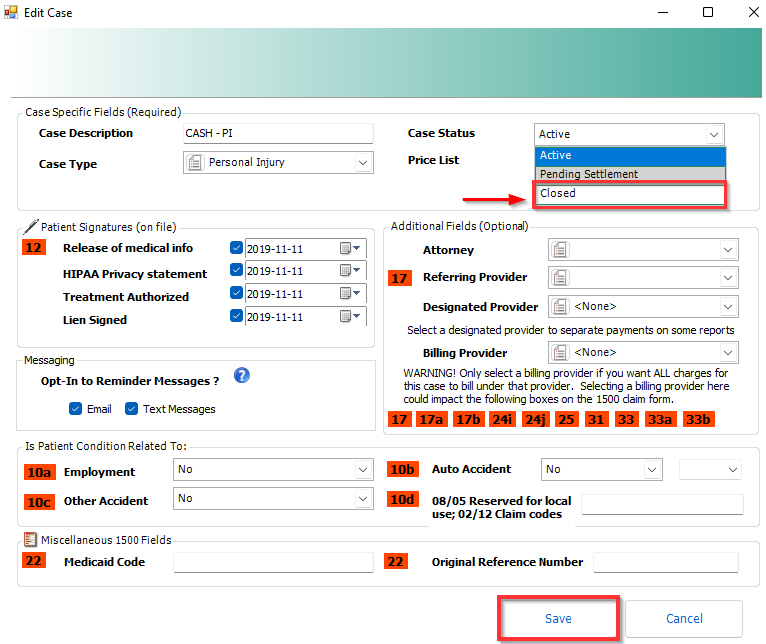
8. Save
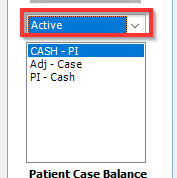
9. Select ACTIVE in Case Drop-down
10. You will only see Active cases listed
Closing Duplicate "Patient File":
Double click the patients name within the Rolodex, Select Edit and Change status from Active to Inactivated or Terminated.
Once selected check the box underneath that states "Do not have system update status automatically"

Click Save
Making the correct changes within the fourth step ensure the issue will not come up again.
- Support Information -
If you have any questions or need assistance with this process please contact Support by:
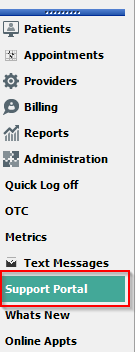
Live chat: Click the 'Support Portal' button in your main toolbar (on left-hand side) within your software, click the green 'Support' box in bottom right of screen.***This has the fastest response time***
Phone: 909-378-9514
Email: support@coactionsoft.com
Once these steps are followed, the incorrect case will no longer be displayed in the active list of cases for the patient and will no longer be available to select when scheduling future appointments for the patient.
Comments
0 comments
Article is closed for comments.