Utilization of Online Scheduling- Clinic Side
Online Scheduling allows the clinic to customize their online scheduling view and place a link to their desired location to allow a patient to schedule an appointment via the clinic website, funnel, etc.
The online scheduling feature may be used in two ways:
1. All appointments scheduled are considered requested and MUST be approved by a clinic member before they can be placed on their appointment book. New and Existing patients alike.
2. The clinic can choose to allow existing patients to move straight to their appointment book without having to be approved first but, New Patients, Leads missing a case and unrecognized patients Must be approved before being placed on the clinic schedule.
All appointments scheduled will either hit the appointment book or online appts queue within 4 minutes.
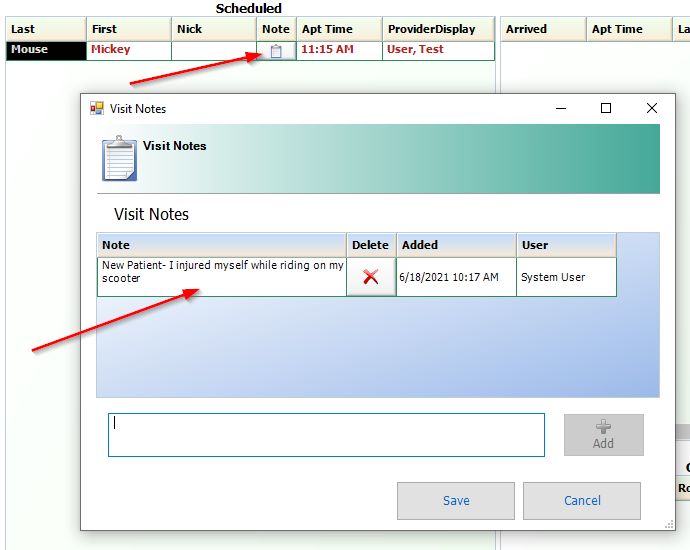
All appointment reasons indicated in the note section will place a clipboard icon with the scheduled appointment and save the information entered unless deleted.
Note: Clinics who are running more than one clinic in their database must utilize option ONE to select which clinic the appointment should be referenced under.
Online Scheduling Queue
To access select online Appts. from your database toolbar. If yours displays red like this image, that means you have an online appointment waiting to be approved.

Here is a display of how your queue might look as new messages are coming into the queue.
I currently have it selected to make sure all appointments get approved before being placed on my schedule to show what all appointments coming in will look like.
You also have a Refresh button to the top right to refresh your queue if you would like to see new data that might have come in while you were looking at the queue.

Green: Indicates an Existing patient the queue recognizes.
Red: Indicates a recognized Lead within the database but, does not have a case associated with them.
Grey: A New Patient not in the system, this could also be an existing patient the system cannot recognize due to the patient using a different email/cell phone that is not associated with their patient file.
To the far right of each appointment request, you will see a "Note" section where the patient placed information as to why they are coming in. This will aid in choosing the correct ROV associated with the new appointment.
How to approve an appointment Request
Existing Patients: Appointments displaying green with a clinic within the clinic dropdown.
- Select an "ROV" from the drop-down.
- Select the Red "Schedule" Button to move the appointment to the schedule and send a notification that their appointment has been approved.
Lead files without a case: You will know they are a lead based on no clinic displaying in the case column but, they are highlighted in Red.
- Select the "New Case" button.
- Select the "ROV" drop-down and select why they are coming in.
- Select the "Red Schedule" Button to move to the schedule and send a notification that their appointment has been approved.
New Patients: Any appointment listed in grey will require you to follow these steps.
- select "Save Patient"
- Select the "New Case" button to create a case. You can create this minimally using the notes provided by the patient. We suggest stating the Case description as Undetermined, Case Type Undetermined, Select clinic price list, and opt the patient into text and email reminders if your clinic is not sending reminders to everyone if they have emails or cell phone numbers present. This will ensure the patient receives your approved appt message.
- Select the "ROV" as to why they are coming in. e.g. "New Patient"
- Select the Red Schedule button to move the patient to the schedule and send a notification that their appointment has been approved.
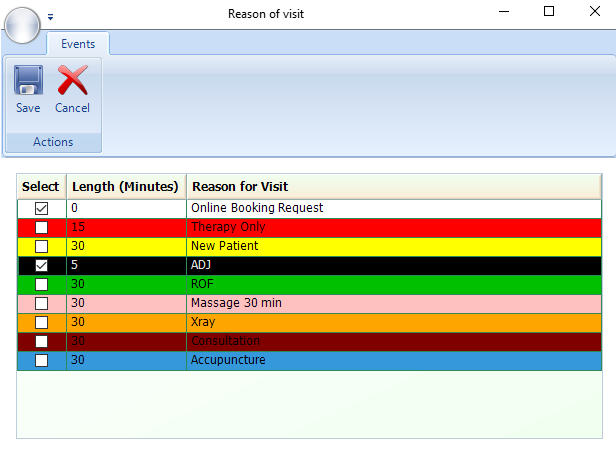
Tip: You can select more than one ROV to be associated with your appointment. e.g. Adjustment + Online Booking Request. This will allow you to see both ROVs connected to the appt on your appointment reports. Please keep in mind the first ROV selected in the list will display on the clinic schedule. IF you want "Online Booking request" to display, you will need to go to Admin, Reason for Visit, and move Online Booking ROV to the top of the list by using the arrows to the right.
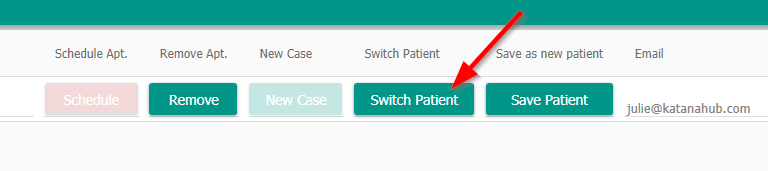
Switching a Patient:
When the patient has the freedom to enter their own information, sometimes it won't match what you have selected in their patient file.
e.g. If you see a request coming in as a new patient request but, you know the person scheduling the appointment is an existing patient you can select the "Switch Patient" button to tie the appointment to the correct patient in your Rolodex.

Approving a Rescheduled appointment
When the appointment comes in, you will see the data from the previous appointment displayed in blue right under the new appointment request in Green.
- It will display the date of the previous appointment, provider, clinic name, and ROV tied to the prior appointment. This allows you to select the right reason for a visit from the drop-down
- When the ROV is selected from the drop-down, you will see the "Schedule" button displayed in Red.
- Select "Schedule" to confirm the request.
- Once the schedule button is selected, the new appointment will move to the schedule and the previous appointment will be removed.

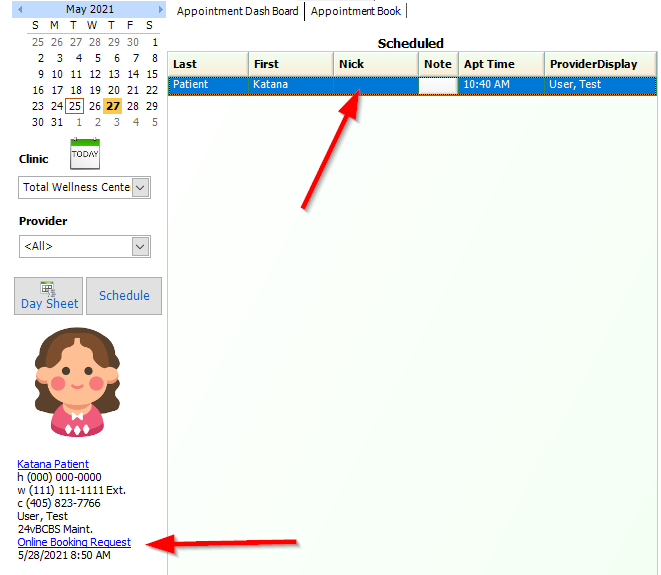
Allowing an Existing Patient to move straight to the schedule
When you make the choice to allow "Existing patients" to schedule straight to the appointment book, Make sure to test the system by scheduling an Existing patient appointment. "Test Patient" would be a great patient to use.
After the first test appointment is created using online scheduling, the system will automatically create a reason for the visit named "Online Booking Request". It can take up to 3 hrs to create as it will be done during the same comb-through used to check new patient statuses, sending campaigns etc.
Once you see the Online Booking request created and attached to that patient appointment in your schedule, your online scheduling link is ready to use.
If you do not want "Online Booking Request" Listed as the ROV. You can select the ROV that shows as a blue hyperlink and change it to the ROV that needs to be selected.
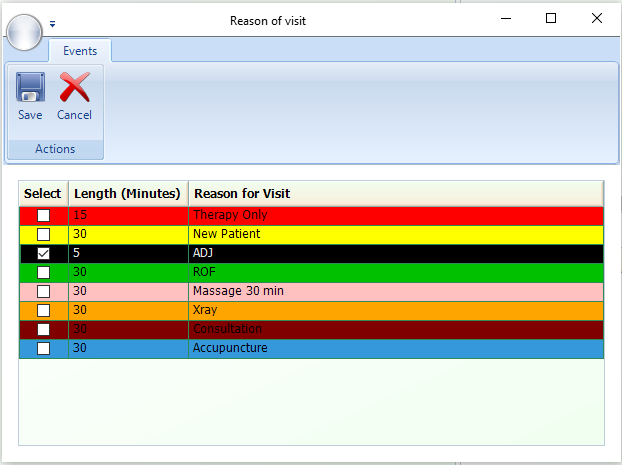
If you would like to be able to use "Online Booking Request" along with another ROV such as adjustment, you will need to go to Admin, Providers, Select Provider, Edit, Reasons for Visit tab, Select "Online Booking Request" and Save to make available for use on the appointment book.
Don't forget to set up Resource Booking if you would like it to work with online scheduling to ensure your patients do not have free reign over your appt book.
Comments
0 comments
Article is closed for comments.