Setting up Surveys:
If you do not want to use Surveys in your clinic, you do not need to follow these instructions. Without surveys, your patients will check into their appointment and be done.
To start: Go to Admin -> Self Check In
Select the Reason of Visit you would like to work on
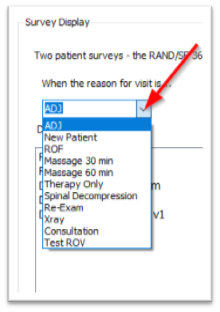
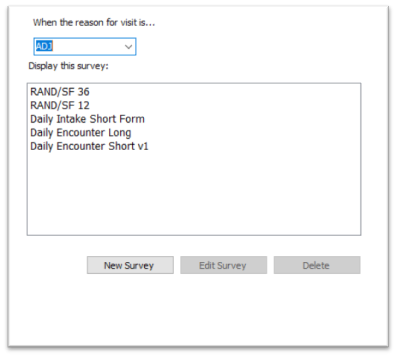
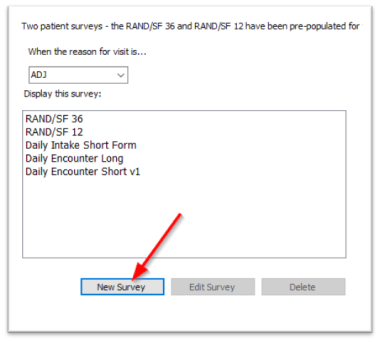
You will be provided a list of Survey options pre-loaded into your software.
Surveys are composed of questions that are grouped into sections. If you choose to use scoring, assign each answer a numeric value and the sum of all answers will be displayed in each section on the final report.
Before tying a Survey to a reason of visit, you will need Select the specific Survey and select the EDIT button to make sure everything in the template is generated to your liking.
If you do not want to use a provided template, you can always select New Survey to create your own.
To Create a New Survey:
Before you begin, it is best if you have your layout of categories, questions within the categories, target location of Soap Notes, phrase added to soap note location based on the patient’s responses to the questions and point value determined (if you are adding a point value) laid out before beginning.
Please note: The reason we suggest you have an Idea laid out is because once a category and questions are created, they can only be deleted. They cannot be moved around if they were created in an incorrect order. This will prevent you from having to start over if not done properly.
Select New Survey
First, you will need to create your Survey Name. Your system will pre-populate “New Survey and today's date”. You will highlight and name it correctly.


Second, Section 1 will be automatically added. You will highlight “Section 1” and name it accordingly.
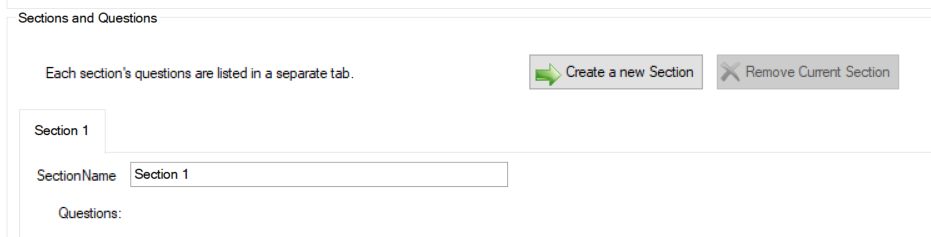
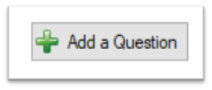
Third, Select Add a Question to the far right
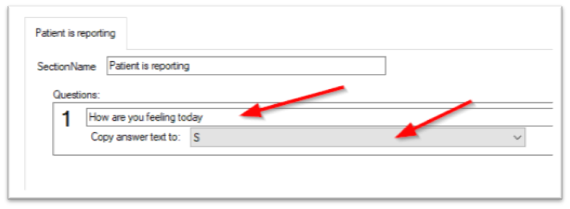
Fourth, you will type in the first question you would like the patient to answer and select the appropriate target area of the soap notes you would like the responses sent to (S, O, A, P, N, E or D).
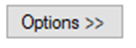
Next, Select The options button to the far right of the question.
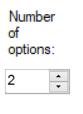
You will be provided 2 Options. You can increase or decrease the number of options provided for that question, to the far right.

You will now fill in the Options the patient will see when provided your questions, fill in the text that will be carried over into the soap note target location and a point value, if you would like a point value attached.
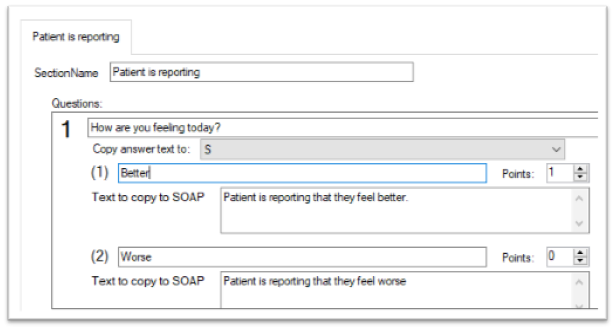
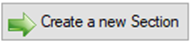
Once you are finished filling out all your questions for section one, you can create an additional section by selecting the “Create New Section” button.
Once you are done creating your survey, Select the Save Button.
You will now see your created survey in the Left Column.
To Attach your Survey to the ROV you created the survey for, select the Right Arrow to move the Survey to the Right Column.
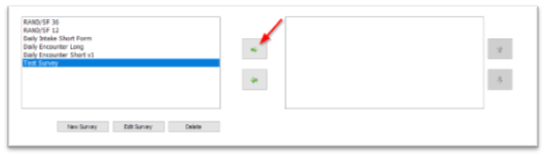
Once your Survey is located on the Right, it is attached to the Reason of Visit. Anytime your patients use the self-check in module and have that ROV attached to their scheduled appointment, they will be prompted to fill out those specific questions.

Once you are finished, Select Save at the bottom Right of the Screen.
Here is an example of what a patient would see when using surveys

Please note: Any Survey Created will be available to attach to any Reason of Visit used in the office.
If you are needing to see a copy of the patients answers, you can view the survey responses when moving the patient from arrived/waiting to checked in/ being treated.
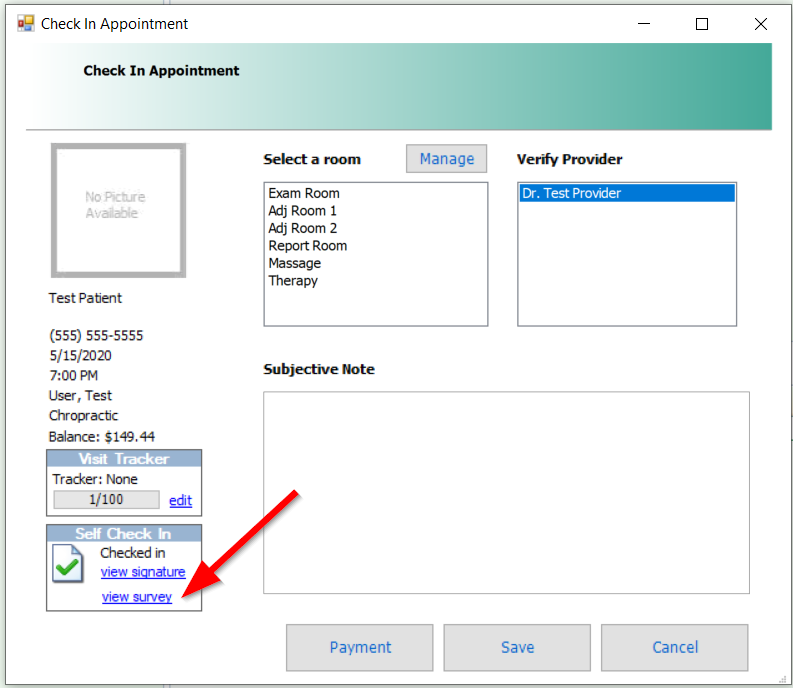
This survey can be printed or exported and saved to the computer.

- Support Information -
If you have any questions or need assistance with this process please contact Support by:
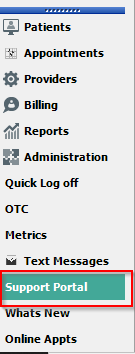
Live chat: Click the 'Support Portal' button in your main toolbar (on left-hand side), click the green 'Support' box in bottom right of screen.
***This has the fastest response time***
Phone: 909-378-9514
Email: support@coactionsoft.com
Business hours: Monday-Friday, 8:00am-6:00pm CST
Comments
0 comments
Article is closed for comments.